Tuesday 26 November 2013

Creating a Tag

To begin this lesson, we had to decide on a wall background on Google we could download and then use for our final piece. We then opened a Photoshop document and create a custom size background and added a new layer.  We selected the calligraphic brush tool [a brush that is designed on an angle] to design a funky tag as seen above. I did my name.
After creating the tag, I selected the FX tool>stroke and began to personalise our tags by selecting options such as Outer glow, Inner Glow, Gradient overlay, Inner shadow etc. to change the colour and the gradient of the colour within and surrounding your design and the shadows/glow. We then flattened the image so it was all one layer, selected it and copied and pasted on our downloaded wall background.


Once the image is pasted, I selected the layer mode to 'multiply' so that the white background disappeared and i was only left with the design of my tag upon the wall background. I realised the wall background was at a slight angle and decided to use Free Transform>Distort to mess with my tag until it fit and looked natural. I then also decided to use a filter to see if I could make my piece more original; I decided to use the filter Paint Daubs as it gave it an interesting glowing outline.

The Final Piece.

Tuesday 19 November 2013

Silhouette Art


For this lesson, our task was to download a set of images that we could use and transform into silhouettes to create a scene.

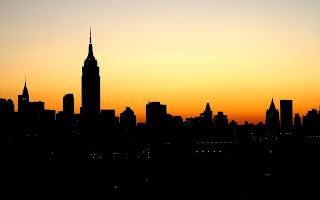
I decided to chose an image of a cityscape to try and recreate a Godzilla/monster destroying the city scene. We hat to be careful to chose an image that would be easy to convert into simple black and whit so, what better then an image that is half way there! I selected the black of the image using the Magic Wand tool-which allows you to select an area of an image within a similar colour range, and then inverted this so that is selected the skyline. I removed the colour to make the skyline white and have the start of my image.
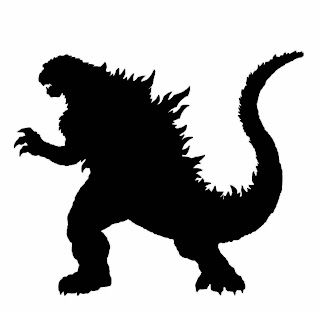
My next step, I downloaded an image of Godzilla and opened it in a separate photoshop document. This time, I used the Quick Selection tool and coloured in the Godzilla image so that he was then a black silhouette like the rest of the image. I then dragged the image over to the original document and resized it to fit and remain in proportion by using the Free Transform tool while holding down shift.
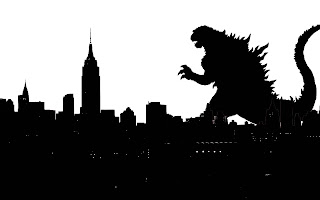
I wanted to place the Godzilla silhouette behind the skyline however, the city skyline image is formatted as a 'backround' rather then layer so, so that I could rearrange the order in which the layers are arranged, I had to unlock the background so that it now became layer 1 but also, I selected the white area and pressed the backshift key so that the Godzilla silhouette is now visible.
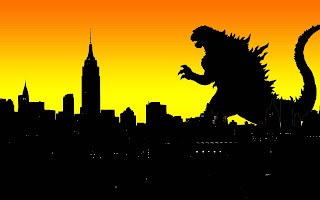
I then added a new layer, selected the layer and decided to play around with the fill layer tool.  I found out I could use a gradient tool to create an interesting background; this layer was also automatically made the background. I then created another new layer and used the Elliptical Marquee tool to create a circle and used the Fill tool to fill the circle white. I arranged the layers so that they were all in order and I had produced my final image.

The Final Image


Wednesday 13 November 2013

Stencil Art

Today, out task was to select an image from the internet and use Photoshop to create stencil art from the image and to use this in an urban scene.

I first selected an image I would use as my wall art; this piece being an image by Andy Council.
The first part of the editing process was to use the 'Threshold' tool on Photoshop to convert the image to black and white and I could adjust the levels so that I had a preferred amount of light and dark visible. On certain images, the threshold tool can make your image grainy however, this image was a pre-edited image with clean cut edges and one tone colour scheme.


To create the faded edges, I used a Filter called 'Diffused Glow'. Again, I could adjust the 'graininess', 'glow amount' and 'clear amount' so that the image was as I wanted.


The final image.


After I finished editing the stencil, I moved it onto a background image- this background is merely a download image of a street I had found from Google.
I then used the 'Free Transform' tool to adjust the size and perspective of the Stencil [now Layer 1] however, before placing the stencil in its final place, I used the 'Lasso' tool to cut around the window and telephone wires to create Layer 2. I could then place the stencil, Layer 1, on the wall of the building followed by Layer 2 [so that the window was clear of any, what would be, graffiti] resulting in a realistic finish.